Saturday, May 15, 2010
Gaining momentum.
This is just a quick side note. More of personal reflection, but hopefully there might be some nugget of gold in here for you too. My photography is, on a personal level, in a really good place right now. I'm very pleased with where it is and where it's headed.
Metaphorically speaking, I've got a fire in my belly. The passion for the art is there, and it's burning.
I want to shoot.
I want to get out and take photos.
I want to travel to new places; explore here and there.
But above all, I want (need) to create.
After looking back at the plethora of recent shoots, I've noticed that my style of both shooting and processing has become increasingly consistent. Not just the style, but the presentation and the quality also seem to be consistent, if not increasing. which for me is a great thing to see.
Being introspective is a good thing every now and then. Re-evaluating past shoots and learning; seeing your progression.
And there's the nugget I think. Constantly look at where you are, so you know where you're going and where you've come from.
Stay sane and get some sleep.
J.P.
Monday, May 10, 2010
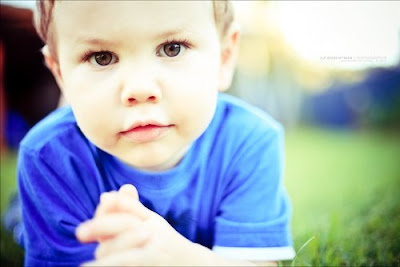
How-To: Sam
Sam: Son of my Mother's other Son.

This is the original file as loaded into Lightroom. On a quick side note, learn your Lightroom shortcuts and little tricks, it's very handy for doing these types of posts, and to see where you've come from in your processing. As a standard in my processing, I always start with the Auto-Tone and Punch Presets, then adjust from there. As with all my portrait works, I pulled the clarity slider back to about -20 (-17 here). I also pushed the warm tones, pulled the saturation, and pushed my contrast. I also pushed the exposure slider up to +1.50. This value was dictated by the histogram. I turned on the "Show Clipping" (J) and adjusted until just before his face was blown out. I also added in a vignette.
I then employed a system of colour pushing that I've worked out. It's quite simple really, in the Color tab of the HSL/Color/Grayscale panel push the saturation to about +20 and the luminance to about -20. I skip the reds and pinks/purples when doing this, mainly because I find that Canon cameras usually over-saturate this range anyway. Those are just guessing numbers, in reality I'm no where near that specific with it, but those are the values I try to keep it around. In finishing I ran over the pic with the spot removal tool (N), just to clean up the leftover pieces of cake on his face. Which then gives us this image:

After this there was nothing for it but to try a bit of split toning. When I come to something that is going to be a major change from the original I always create a virtual copy of the image and then continue working on that, that way I always have the big stepping stones of my processing workflow.
I put the highlights into the green, and the shadows into the pink/purples, then pushed up the saturation on both till it got to a point where it looked right. Looking back at my settings I also pulled my exposure back to +1, added in some recovery and fill light and pushed my clarity way up. And here is where that got me:

Ok, now here's the important bit. Which is a bit of workflow that I try(and usually end up keeping) on just about every image I put up on flickr. Export your image to photoshop (or GIMP). take the background layer and duplicate it 4 times. You should now have 5 layers exactly the same.
On the top layer, do a High-Pass Filter, with a radius of about 60. Set the layer blend to Soft Light.
On the next layer do a Soft Light layer blend and set the opacity to about 40% (starting point).
On the next layer do a Screen layer blend, and also set the opacity to about 40%.
This is optional and can sometimes help manage a bit of the noise, Gaussian blur this layer to about 40px, keep the Normal layer blend and set the opacity to about 40%.
Play with your opacity sliders and various variables until you get a result that you like. Onto that I added my watermark and a 4px wide black boarder around the image. Save and export/import back into Lightroom.

Then just a small tweak in white balance (warming) and a touch of fill light, and it's done.
And to save you from scrolling up, here's the final image again.
Hope that shed some light on it all for you.
J.P.
Friday, April 30, 2010
Postcards from tomorrow.
Better late than never I always say! So last weekend was the annual epic mission southwards to catch the autumn colours and have a general scout for the following year. This year we ventured further southwards than previously and spent the first night in Armidale and the second night in Glen Innes. Kane and Matt drove down early Friday morning, and managed to catch some amazing sights. Mel and myself ventured down on Friday afternoon after yours truly had finished work.
The Saturday morning started off quite well. Matt had been in contact with a couple that live down that way and had managed to wrangle up a shooting location on some private property just outside of Armidale. That was an absolutely amazing place for a dawn shoot.
It had all the classical elements, you'd expect, fences, lone trees, windmills, creeks and a fair sized lake. And to top it all off, there was just the perfect amount of fog rolling across the land to make shooting condition perfect.
The above shot was taken just before the sun rose. I have other pics of this morning, with different compositions, etc. Believe me, this is just a teaser. Not long after the sun rose, there was nothing for it but to take advantage of the early light and the sweet still calm of the chill morning air. And with that, it was a quick scoot round the other side of the lake, throw on the NDx400 and shoot the clouds. The water was solid, like sheet of shiny glass; the perfect thing for sweet, sweet reflections.
After we'd finished there we retired back to the hotel room to catch a few Z's, pack up our gear, dump photos off the memory cards and charge the camera batteries. Not long after check out we found ourselves travelling further south, once again under the direction of Matt's contacts. Our destination this time was something a little more well known; Gostwyck Church. This is an amazing little church perched haphazardly onto the middle of what can only be described as an over-sized traffic island.
I've no images to show of that church just yet, but rest assured, that there are some amongst the 1300+ images captured that weekend, and you may just get to see them. What fascinated me about the church and it's surrounds was this massive tunnel of trees that lead off into some private property. I borrowed Mel's IR filter, and went to town on this.
While that image was being taken (it took several minutes) i grabbed the 50D and tried my hand at a technique I'd come up with a few weeks earlier. In short the technique is this: Long lens, small aperture, make a panorama. The resultant effect is an image that has an impossibly small Depth-Of-Field for a single image. Which really adds an extra amount of 'pop' to it.

Excuse me, can you help? I'm having trouble predicting the future.
Canon 50D + Canon 70-200mm f/2.8L IS USM
Trust me when I say that you really need to view this image large to get the full effect. After Gostwyck Church we started our journey north towards Glen Innes. That part of the trip I'll save for another time.
On another note, but still about the trip, I had purposely set out to test and take video footage with the 5DmkII. The end goal was to put it together into a short film that kind of 'chronicled' our mission. I encourage you to watch it large and in HD.
The Saturday morning started off quite well. Matt had been in contact with a couple that live down that way and had managed to wrangle up a shooting location on some private property just outside of Armidale. That was an absolutely amazing place for a dawn shoot.
It had all the classical elements, you'd expect, fences, lone trees, windmills, creeks and a fair sized lake. And to top it all off, there was just the perfect amount of fog rolling across the land to make shooting condition perfect.
The above shot was taken just before the sun rose. I have other pics of this morning, with different compositions, etc. Believe me, this is just a teaser. Not long after the sun rose, there was nothing for it but to take advantage of the early light and the sweet still calm of the chill morning air. And with that, it was a quick scoot round the other side of the lake, throw on the NDx400 and shoot the clouds. The water was solid, like sheet of shiny glass; the perfect thing for sweet, sweet reflections.
After we'd finished there we retired back to the hotel room to catch a few Z's, pack up our gear, dump photos off the memory cards and charge the camera batteries. Not long after check out we found ourselves travelling further south, once again under the direction of Matt's contacts. Our destination this time was something a little more well known; Gostwyck Church. This is an amazing little church perched haphazardly onto the middle of what can only be described as an over-sized traffic island.
I've no images to show of that church just yet, but rest assured, that there are some amongst the 1300+ images captured that weekend, and you may just get to see them. What fascinated me about the church and it's surrounds was this massive tunnel of trees that lead off into some private property. I borrowed Mel's IR filter, and went to town on this.
While that image was being taken (it took several minutes) i grabbed the 50D and tried my hand at a technique I'd come up with a few weeks earlier. In short the technique is this: Long lens, small aperture, make a panorama. The resultant effect is an image that has an impossibly small Depth-Of-Field for a single image. Which really adds an extra amount of 'pop' to it.
Excuse me, can you help? I'm having trouble predicting the future.
Canon 50D + Canon 70-200mm f/2.8L IS USM
Trust me when I say that you really need to view this image large to get the full effect. After Gostwyck Church we started our journey north towards Glen Innes. That part of the trip I'll save for another time.
On another note, but still about the trip, I had purposely set out to test and take video footage with the 5DmkII. The end goal was to put it together into a short film that kind of 'chronicled' our mission. I encourage you to watch it large and in HD.
Sunday, April 18, 2010
Canon 5DmkII; It's about the Results.
A little bit of sunshine to brighten your day.
Well, it's been a week with the 5DmkII and to keep it brief, the camera is amazing, especially when compared to the 40D/50D. When you first pick it up, you can feel the extra weight and heft in the body, and the larger size over the 40D and 50D make it much nicer to hold, even without a battery grip (which would be my preferred method of use). The camera just feels more solid.
The thing I really love about it though (physically speaking), is the "ka-chunk" and the feel of the mirror-slap/shutter.
Image wise, it is superb, straight away I could spot the difference when I compared shots with the 50D. Both the DOF and bokeh are both a substantial improvement over the 50D. The DOF is more shallow and pronounced by the full frame sensor. The shots seem 'smoother' and the high ISO noise handling is definitely a lot better. The first outing this camera had was to shoot a wedding on the Friday just gone, and I've many a usable shot taken at ISO3200.
The only let down (and this is the general vibe I get from the community, as well as personal opinion) is in the Auto-Focus system. It's old. The centre point is accurate and sensitive in extreme low-light situations, but the surrounding 8 leave a lot to be desired.
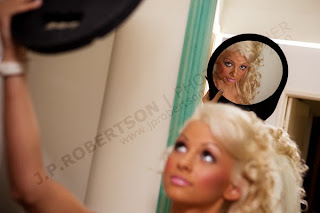
But enough of that silly talk, here's one of my favourites from the wedding.
 Gear: Canon 5DmkII+Canon 24-70mm f/2.8L+Canon 580exII
Camera Settings: 1/60s, ISO800, f/4.0 @ 63mm
Bride: Chloe Newton (about to become Chloe Blanchard)
Hair and Make-up: Andrea Bartlet of www.completetreat.com.au
J.P.
Sunday, April 11, 2010
It was bound to happen...one day.
Little did I know it would be today.
So I was shooting some 13 and 18 piece instrumental bands last night, when the 50D started to do some funny things. First it started with the shutter button on the battery grip not responding, then the shutter button on the body itself wasn't responding... then when I'd half press it, you could visually see the aperture close ever so slightly through the viewfinder...all in all, quite a worrying thing to be happening. Especially considering I've got a wedding coming up this Friday, for which I need a body that works. So the time came when I would have to pool my monies, live off naught but noodles for the next month, and have a bit of a spend.
...and spend I did.
Walked out with a Canon EOS 5DmkII, Canon 17-40mm f/4.0L USM, and 2 years extra insurance on the body. But I figure it's worth it. I've really been getting back the passion and fervor for my photography recently, and I really want to get into some bigger commercial shoots, and assist on some and go back to TAFE/university and skill-up.
This is just another step in the road.
In other news...
Here's a few pics you may (or may not of) missed recently...(click to visit them on my flickr)
Sunday, April 4, 2010
45:330:241
45 minutes sleep. 330km travelled. 241 second exposure. 1 epic evening/morning/mission.
The night started at 10:30pm on Thursday night, when I lay down for some sleep, after a restless 45 minutes I awoke/stumbled out of bed and jumped in the car, ready for my Friday to start. 2 hours later, via the Caboolture service centre to pick up Kane, we were meeting Mel at Dicky Beach on the Sunshine Coast. Our goal was simple, the addition of 4 day old full moon and a shipwreck on a clear beach at 1:30am, is an unmissable occasion. The near full moon provides an amazing amount of light, and allows you to capture locations like these as most people would never see them.
The part I love most about the beach at these times of night is that the tides have come and gone; yesterdays comings and goings have been washed away and the beach is clean and clear. Ready for photographers to come in and create their particular brand of art.
It's such a free feeling.
You've got to be there to get the shot.
J.P.
Wednesday, March 31, 2010
Austentatious
This is another local band from Brisbane, Australia, called Austentatious. They feature an excellent line-up of very talented local musicians. This band is primarily a Bob Marley Tribute/Reggae band, with the aim for coorporate work.
As you can see, it's a fairly simple setup, but the real magic happens in Post-Processing. The quick and dirty version of my workflow for this images was as follows:
- Import into Lightroom
- Do a few minor adjustments (white balance, blacks, crop and straighten)
- Run over it with the spot removal tool and remove all the unwanted bits and pieces
- Export into GIMP
- Apply a Soft light, Screen, and High Pass Filter layer.
- Adjust the opacity of the layers until the desired look is achieved.
- Apply the watermark,
- Export/import back into Lightroom
- Upload.
I did say it would be quick and dirty. If you have any questions/comments about my workflow or setup, or about what I do in general, then please leave a comment below!
J.P.
Subscribe to:
Posts (Atom)

